This is by no means my first steek… but I still consider it new territory, because it is my first steek in BULKY yarn (Alafoss Lopi).
a) I chose not to machine-sew these steeks as I sometimes do with small 2-3 stitch steeks. My walking foot doesn’t lift high enough above the thick fabirc, and the double-layers of yarn through the colour-work sections were even thicker than the already tricky stockinette portions.
b) I’m used to at least 6-8 steek stitches per steek. With the bulky wool, I only had 2 or 3 stitches in my steek, because I was concerned the bulky fabric would be too thick, with 6-8 sts of steek fabric added to each seam. I read some of the published Alafoss patterns, from Icelandic designers, and they all seemed to suggest 2 stitch steeks in reverse stockinette so I followed suit (this time…)
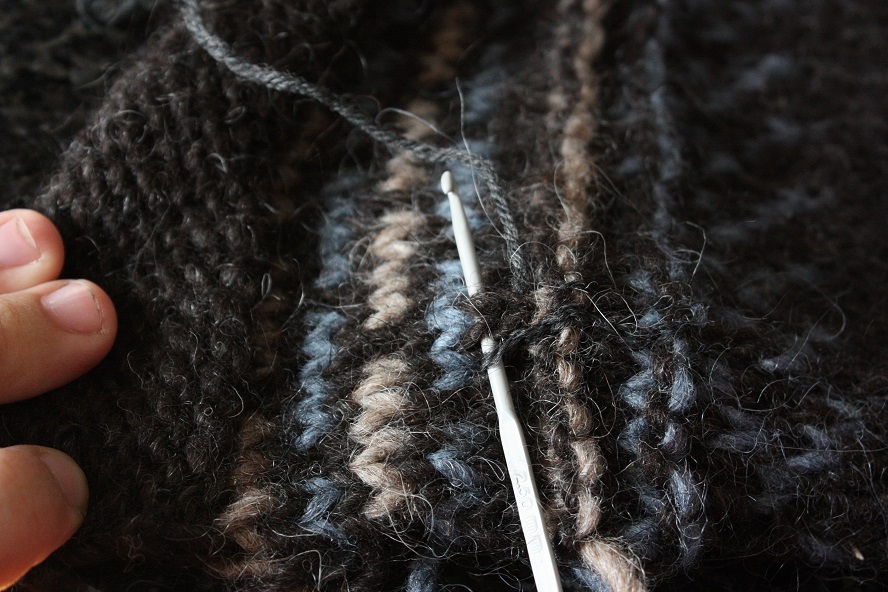
Having just finished buying and reading Elizabeth Zimmerman’s sweater workshop (updated edition), I decided to try a crochet reinforced steek for a change.
Here I am using grey sock yarn and a 2.5mm crochet hook, to slip-stitch crochet into the side of every “V” in the column of steek stitches.
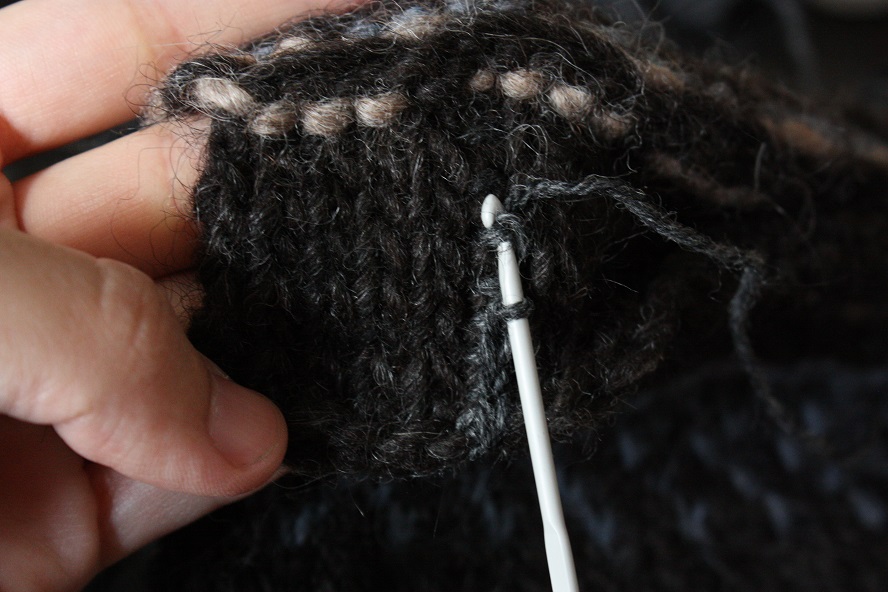
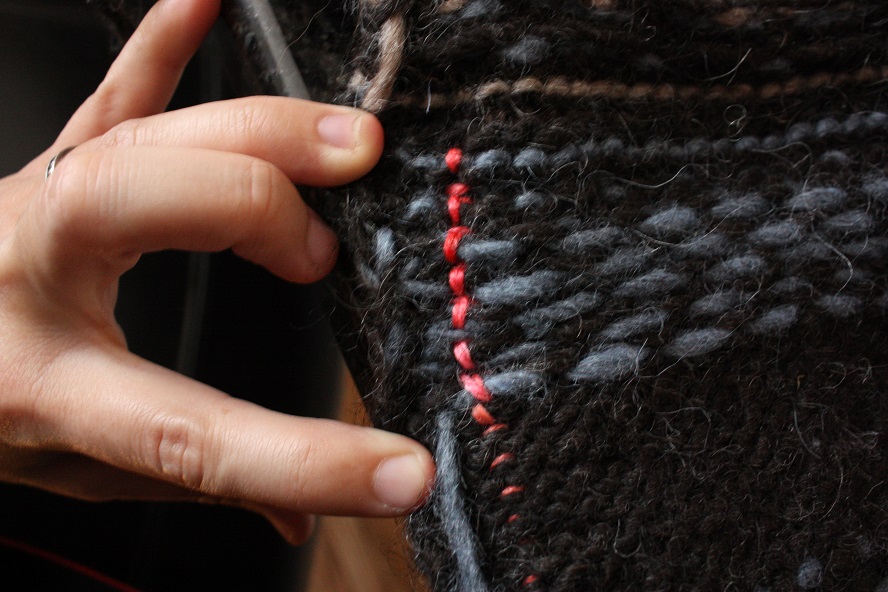
Once I got to the end of the column, I flipped the fabric over and slip-stitch crocheted into the bars at the back of each of the newly crocheted stitches, just to add extra reinforcement at the top and bottom edges of the fabric:
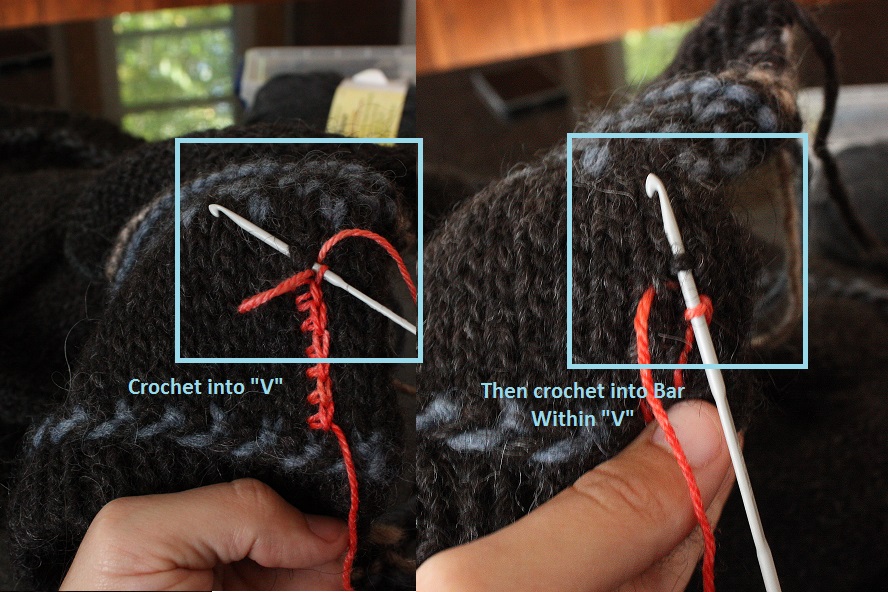
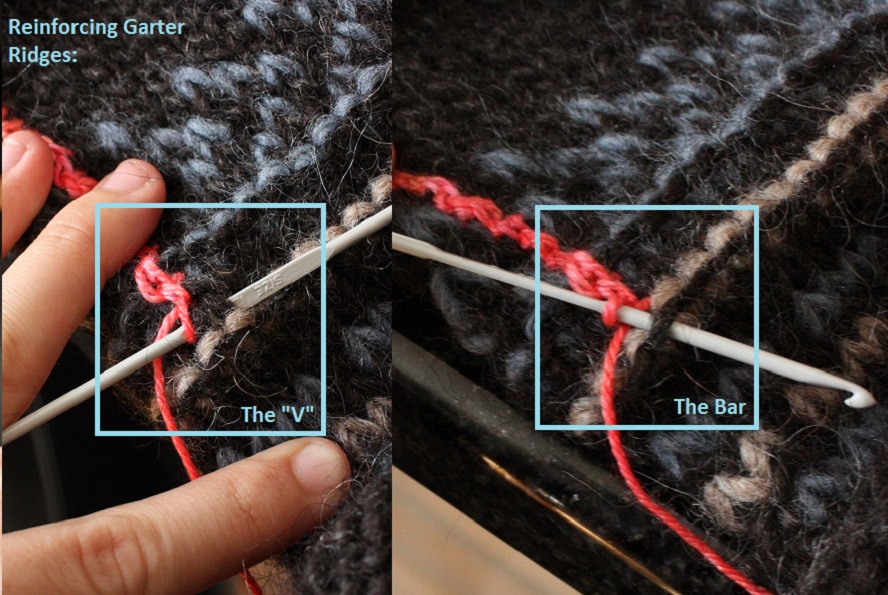
While this seems simple enough, I am extremely paranoid about steeks and this fabric is not your every day Lopi sweater. The fabric had a combination of garter stitch, colour-work, stockinette, and reverse-stockinette sections to reinforce. Here are some extra measures I took. I’ll illustrate them with coral sock yarn so that you can see what is going on:
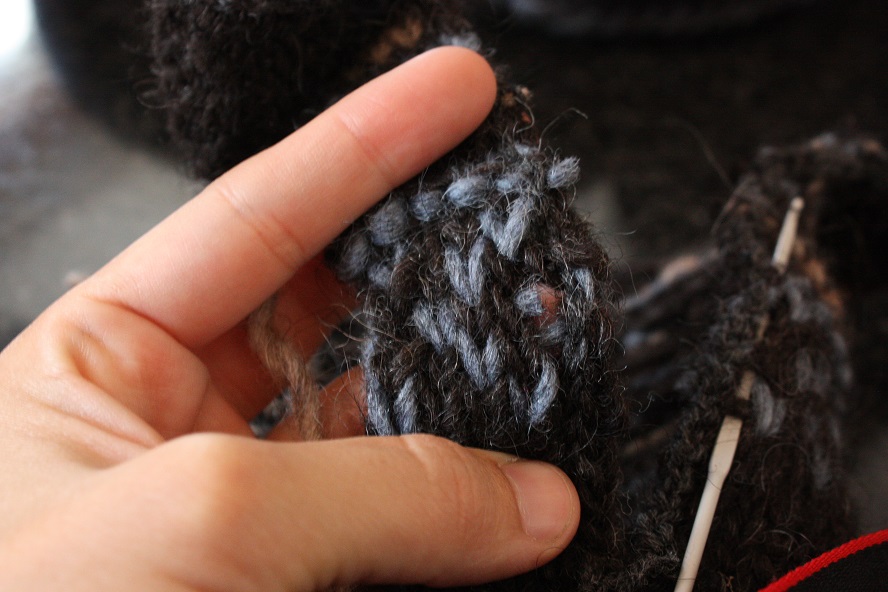
Instead of only crocheting into the side of each “V”, after each “V” I also crocheted into the top of the stitch (the bar) between the “V”. You can find this bar if you push your hook down into the front of the “V” and work it open:
It leaves the reinforcement looking a little messy, but it is worth it.
On the garter stitch ridges, the bar is even easier to spot and crochet into, but the “V” is harder to find:
Make sure you capture all the floats along the back as you crochet down. For instance, when you pick up the bar (or the “V”) for a row that was knit with both blue and grey, make sure you are picking up both a blue and a grey strand with the crochet hook for that 1 slip stitch crochet. Here is what the wrong side should look like:
And now for the moment of truth….
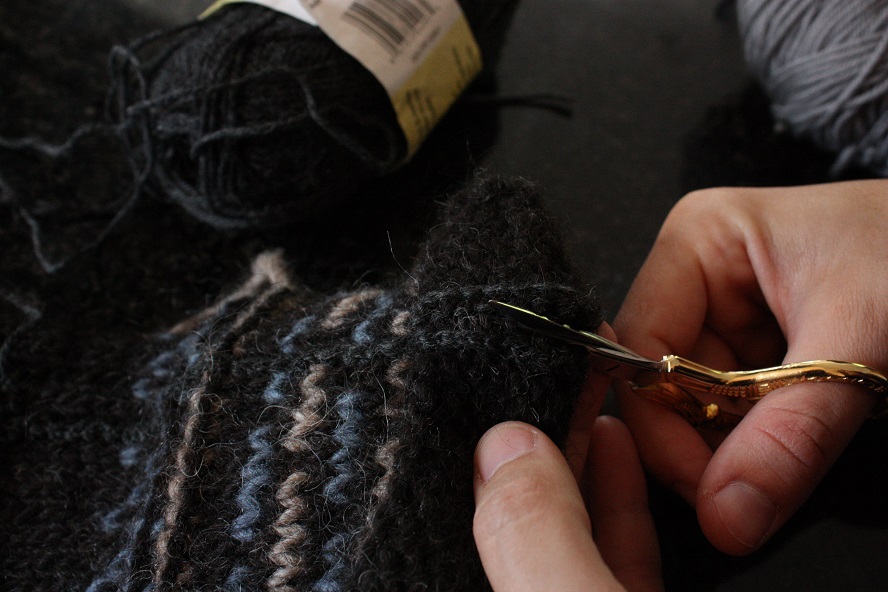
Success! Here is the right side and the wrong side of the steek:
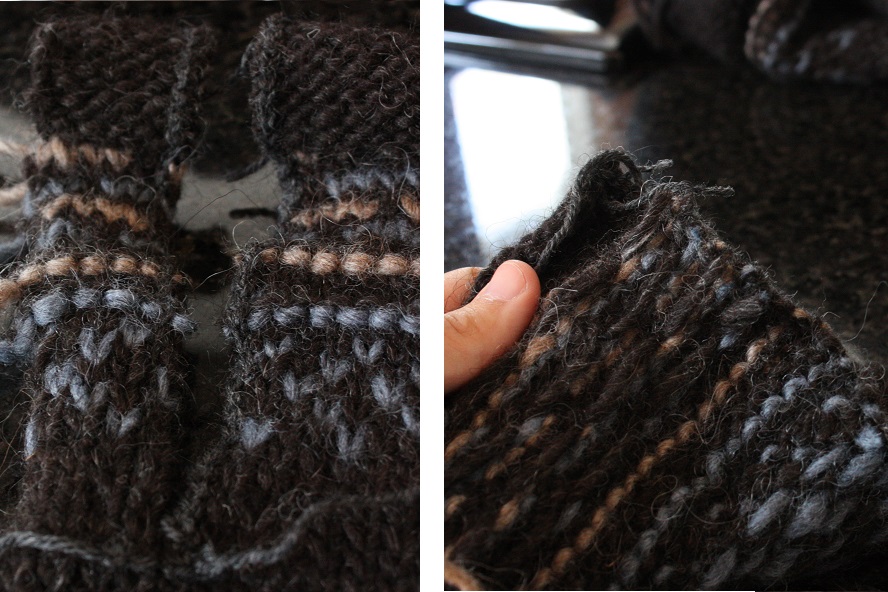
And this is precisely why I always keep my swatches. So I can practice doing bad things to them. This steek example was entirely practiced on my swatch, before I went and gambled with the actual sweater:
I cut 2 steeks on that swatch. The first one did NOT use my extra measures of crocheting through the bar as well as the V, and the result was the worst nightmare of steekers everywhere:
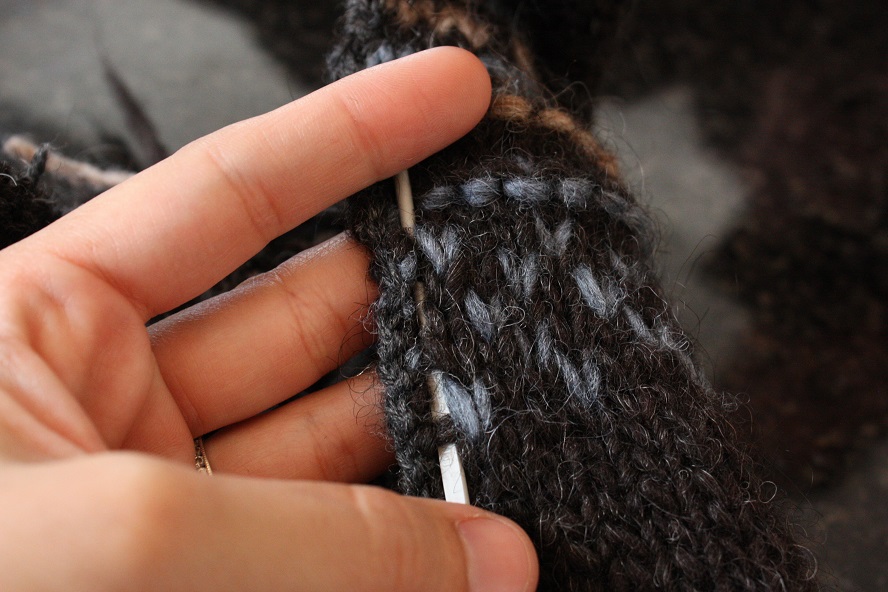
For future reference here are the stitches that will be picked up with a darning needle along the armhole edge, when the sleeve is sewn into the armhole. I learned, through trial and error, that I cannot pick these stitches up with a 6mm needle and just knit the sleeve out from the armhole. Spectacularly reinforced as it is, the steek came unraveled when I tried to push that big needle through those tiny bars (below), so I will resort to seaming the sleeve to the armhole after all, and knitting the sleeve separately.
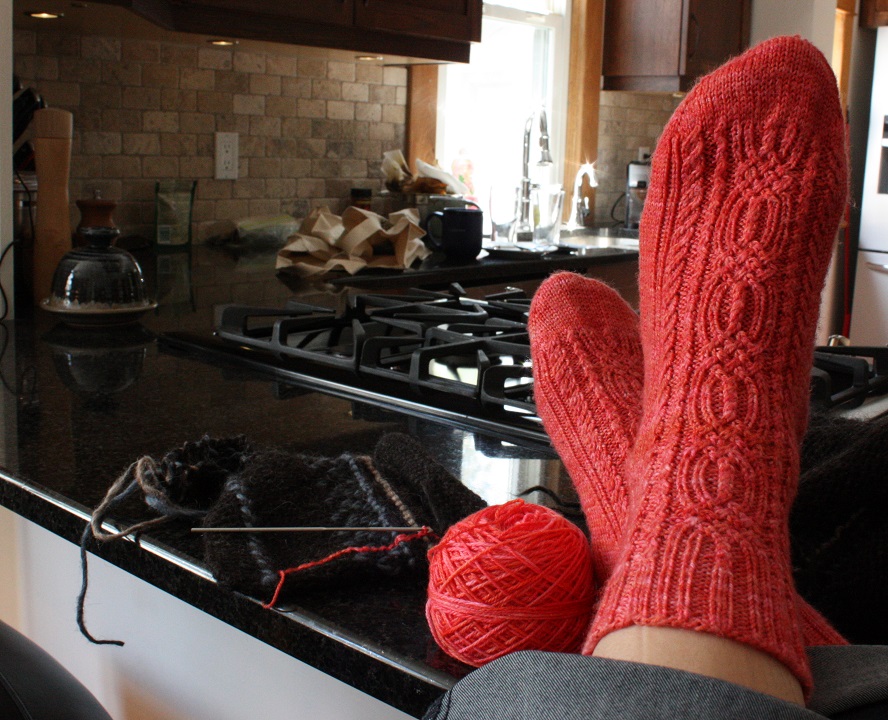
And what is that lovely coral yarn, you ask? It is the leftovers from my favourite socks. My mom bought me the yarn at the Knitter’s Frolic:)
Yarn, pattern, and project notes here: http://ravel.me/Shaulaine/b1